
A level concrete floor means your home’s flooring is durable and visually appealing. Concrete floors are often ignored until cracks, voids, or uneven surfaces become serious issues. Prompt repairs and proper leveling create a stable, long-lasting foundation for any flooring type.
Possible Reasons Concrete Floors Are Damaged
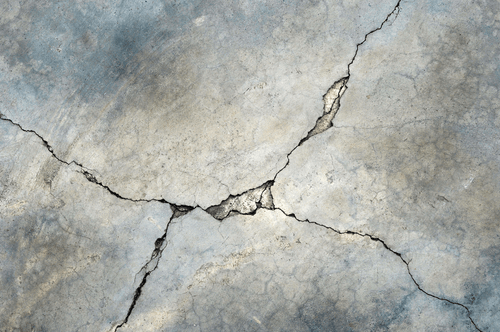
Concrete floors are strong but can still suffer from wear and tear over time. Common causes include voids, curling, shrinkage, and moisture damage.
Voids often result from settling, poor compaction, or cracks spreading, creating structural weaknesses that lead to an uneven floor. Curling occurs when the top layer of concrete dries faster than the bottom, causing tension that lifts the edges. This can res
ult in joint failure and exacerbate leveling challenges.
Shrinkage, typically caused by improper curing, can also leave floors uneven and may require grinding or filling before leveling. Finally, moisture (especially in high-humidity areas like basements) can cause cracking and further unevenness, making it essential to address these cracks before applying a leveling compound.
Understanding these common types of damage helps determine the best approach to repairing uneven concrete floors. Issues like cracking, curling, or voids each require specific solutions to restore the surface effectively, as detailed in our discussion on concrete surface defects.
How to Level a Concrete Floor
Repairing and leveling a concrete floor requires a systematic approach. Whether the damage stems from voids, curling, or moisture-related cracks, following these steps will help ensure a smooth and even surface.
- Clear the Room: Remove all furniture and debris. A completely clean floor ensures no obstacles during the leveling process.
- Identify High and Low Points: Use a carpenter’s level or a laser level to pinpoint uneven spots. Mark these areas to guide your repairs. This step is essential for determining how much leveling compound or grinding will be needed.
- Prepare the Floor: Vacuum the surface thoroughly to remove dust, debris, or oil residues. It’s crucial to start with a completely clean surface, as debris can compromise the effectiveness of the concrete floor leveler.
- Repair and Fill Problem Areas: Use a concrete repair mixture to address low spots and cracks. For high spots, employ a concrete grinder to create a flat, uniform surface. If grinding isn’t sufficient or leveling seems impractical, exploring other surface preparation methods can offer effective solutions. While grinding, always wear protective gear, including goggles and a dust mask.
- Apply the Leveling Compound: Mix the self-leveling compound according to the manufacturer’s instructions. CTS Rapid Set 50-pound Tru Self-Leveling Cement is an excellent option for this step. Pour the mixture evenly over the floor, allowing it to flow and fill low areas. The compound will naturally settle, creating a level surface.
- Smooth the Surface: Use a steel floor smoother to spread the compound evenly and eliminate air bubbles. This final step ensures a flawless finish. Allow the leveling compound to dry completely, typically 24 hours, before proceeding with any additional flooring.
What Is the Best Way to Level Concrete?
The best way to level a concrete floor depends on the type and extent of the damage and the intended use of the space. Factors like surface preparation, product selection, and application technique play critical roles in achieving a smooth and level finish.
- Assessing the Floor’s Condition: Thoroughly evaluate the floor for cracks, voids, high spots, and uneven areas. Minor flaws require a thin leveling layer; severe voids or curling require grinding or patching first. Always repair underlying damage first to ensure long-term results.
- Choosing the Right Materials: It is crucial to select the correct leveling compound. For example, Rapid Set 50-pound Tru Self-Leveling Cement is ideal for fast, durable results on floors with moderate imperfections. For more significant leveling needs or areas with excessive wear, consider a product like Rapid Set 50-pound LevelFlor Self-Leveling Cement. Be sure to follow the manufacturer’s guidelines to achieve optimal results.
- Surface Preparation: Preparation is key to a successful leveling project. Ensuring the floor is completely clean and free of debris, oil, or moisture will help the leveling compound adhere properly. For heavily contaminated floors, additional cleaning steps or surface primers may be required.
- Application Techniques: While self-leveling compounds are designed to flow naturally into low spots, proper mixing and pouring techniques ensure consistent coverage. A trowel or floor smoother spreads the compound evenly and removes air pockets that weaken the finish.
- Curing Time: Allow the leveling compound to cure fully before applying additional flooring or finishes. Depending on the product and environmental conditions, this curing period typically ranges from 24 to 48 hours.
By carefully assessing the condition of the concrete, selecting the appropriate materials, and following best practices for preparation and application, you can ensure a level and durable floor that will stand the test of time.
Achieving a Smooth, Level Surface
Leveling a concrete floor is a critical step in preserving its durability and creating a solid foundation for any type of flooring. You can achieve professional-quality results by addressing issues like curling, voids, or cracks and using reliable products such as Rapid Set Tru Self-Leveling Cement.
If you have questions or need expert guidance, the team at Runyon Surface Prep is always ready to help with your concrete leveling needs.