
Recently, we realized we needed a nice-looking workbench for a magnetic preload system assembly. When we started thinking of creative ways to use materials around the shop, we came up with a great idea. Why not build an epoxy resin workbench from scratch? So we did, and we documented it. What follows is a guide to epoxy as a tabletop surface coating, along with a step-by-step guide to applying it.
Why Build an Epoxy Workbench Top
Epoxy is one of the best workbench surface coatings you can use for a top that needs to withstand abrasion and hard work. If you go this route, you’ll have a tabletop made of materials that are 10x stronger than concrete.
Other perks of an epoxy workbench top include:
- Crack resistance
- Warp resistance
- Longer lifespan than an ordinary wooden tabletop
- Easy to clean (liquids bead off and wipe well)
- A professional finish that’s easy enough on a budget
- Customizable with metallic pigments, logos, or other decorative effects
Still unsure if epoxy is the right fit? Check out our breakdown of epoxy coating pros and cons.
Materials and Tools Checklist
Ready to get started? Here’s what you’ll need for your DIY epoxy tabletop:
- 2×4 lumber (quantity depends on your desired bench size)
- Wood screws
- 40-grit sandpaper
- 220-grit sandpaper
- Epoxy thickener
- Epoxy primer
- Metallic epoxy coat
- Magic trowel (for spreading metallic epoxy)
- Acetone (surface wipe-down before logo step)
- Logo or design stencil (optional)
- 1-inch brush (for stencil work)
- Urethane topcoat
- 3/8-inch roller nap
How to Ensure a Smooth Finish
A couple of things to note before you get started:
- Temperature makes a difference. Apply coatings between 60–85°F for best results.
- Avoid high-humidity areas, as humidity can cause epoxy to turn milky, also known as “blushing.”
- Make sure to mix your epoxy products thoroughly, or you risk soft spots.
- Tape off the edges of your bench before application to get clean lines.
Step-by-Step Guide
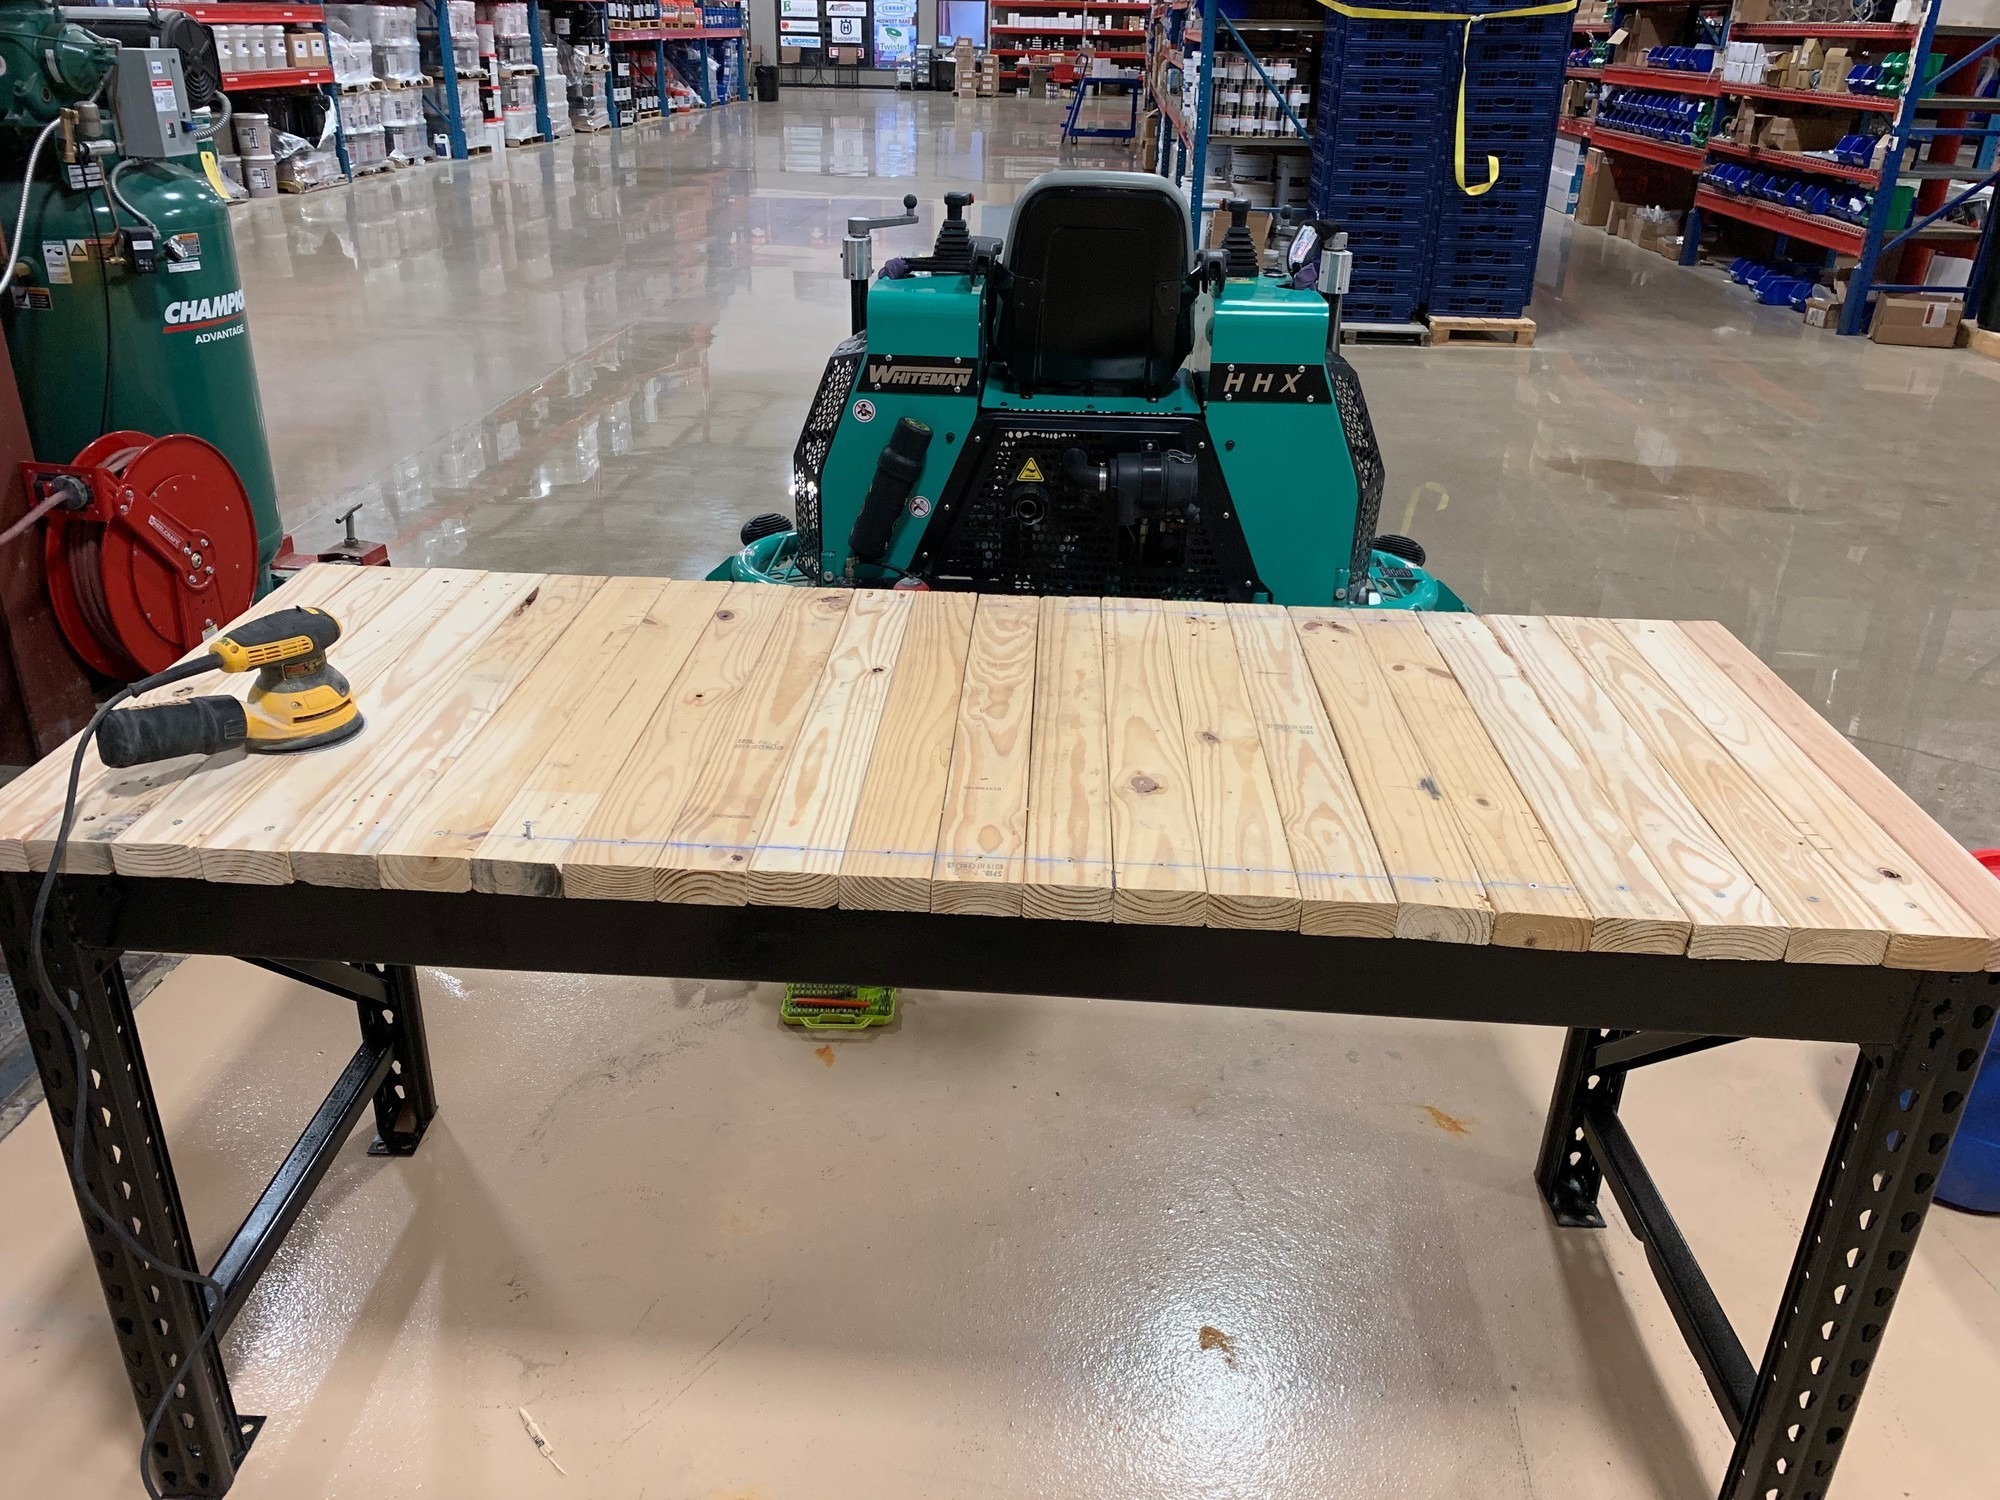
Step 1: Gather multiple 2 x 4’s and screw them into a frame. Once you have the pieces screwed together, sand the wood down to a smooth finish with 40-grit sandpaper. Make sure the frame is flat before you start coating. Even a slight bow will show up under epoxy.
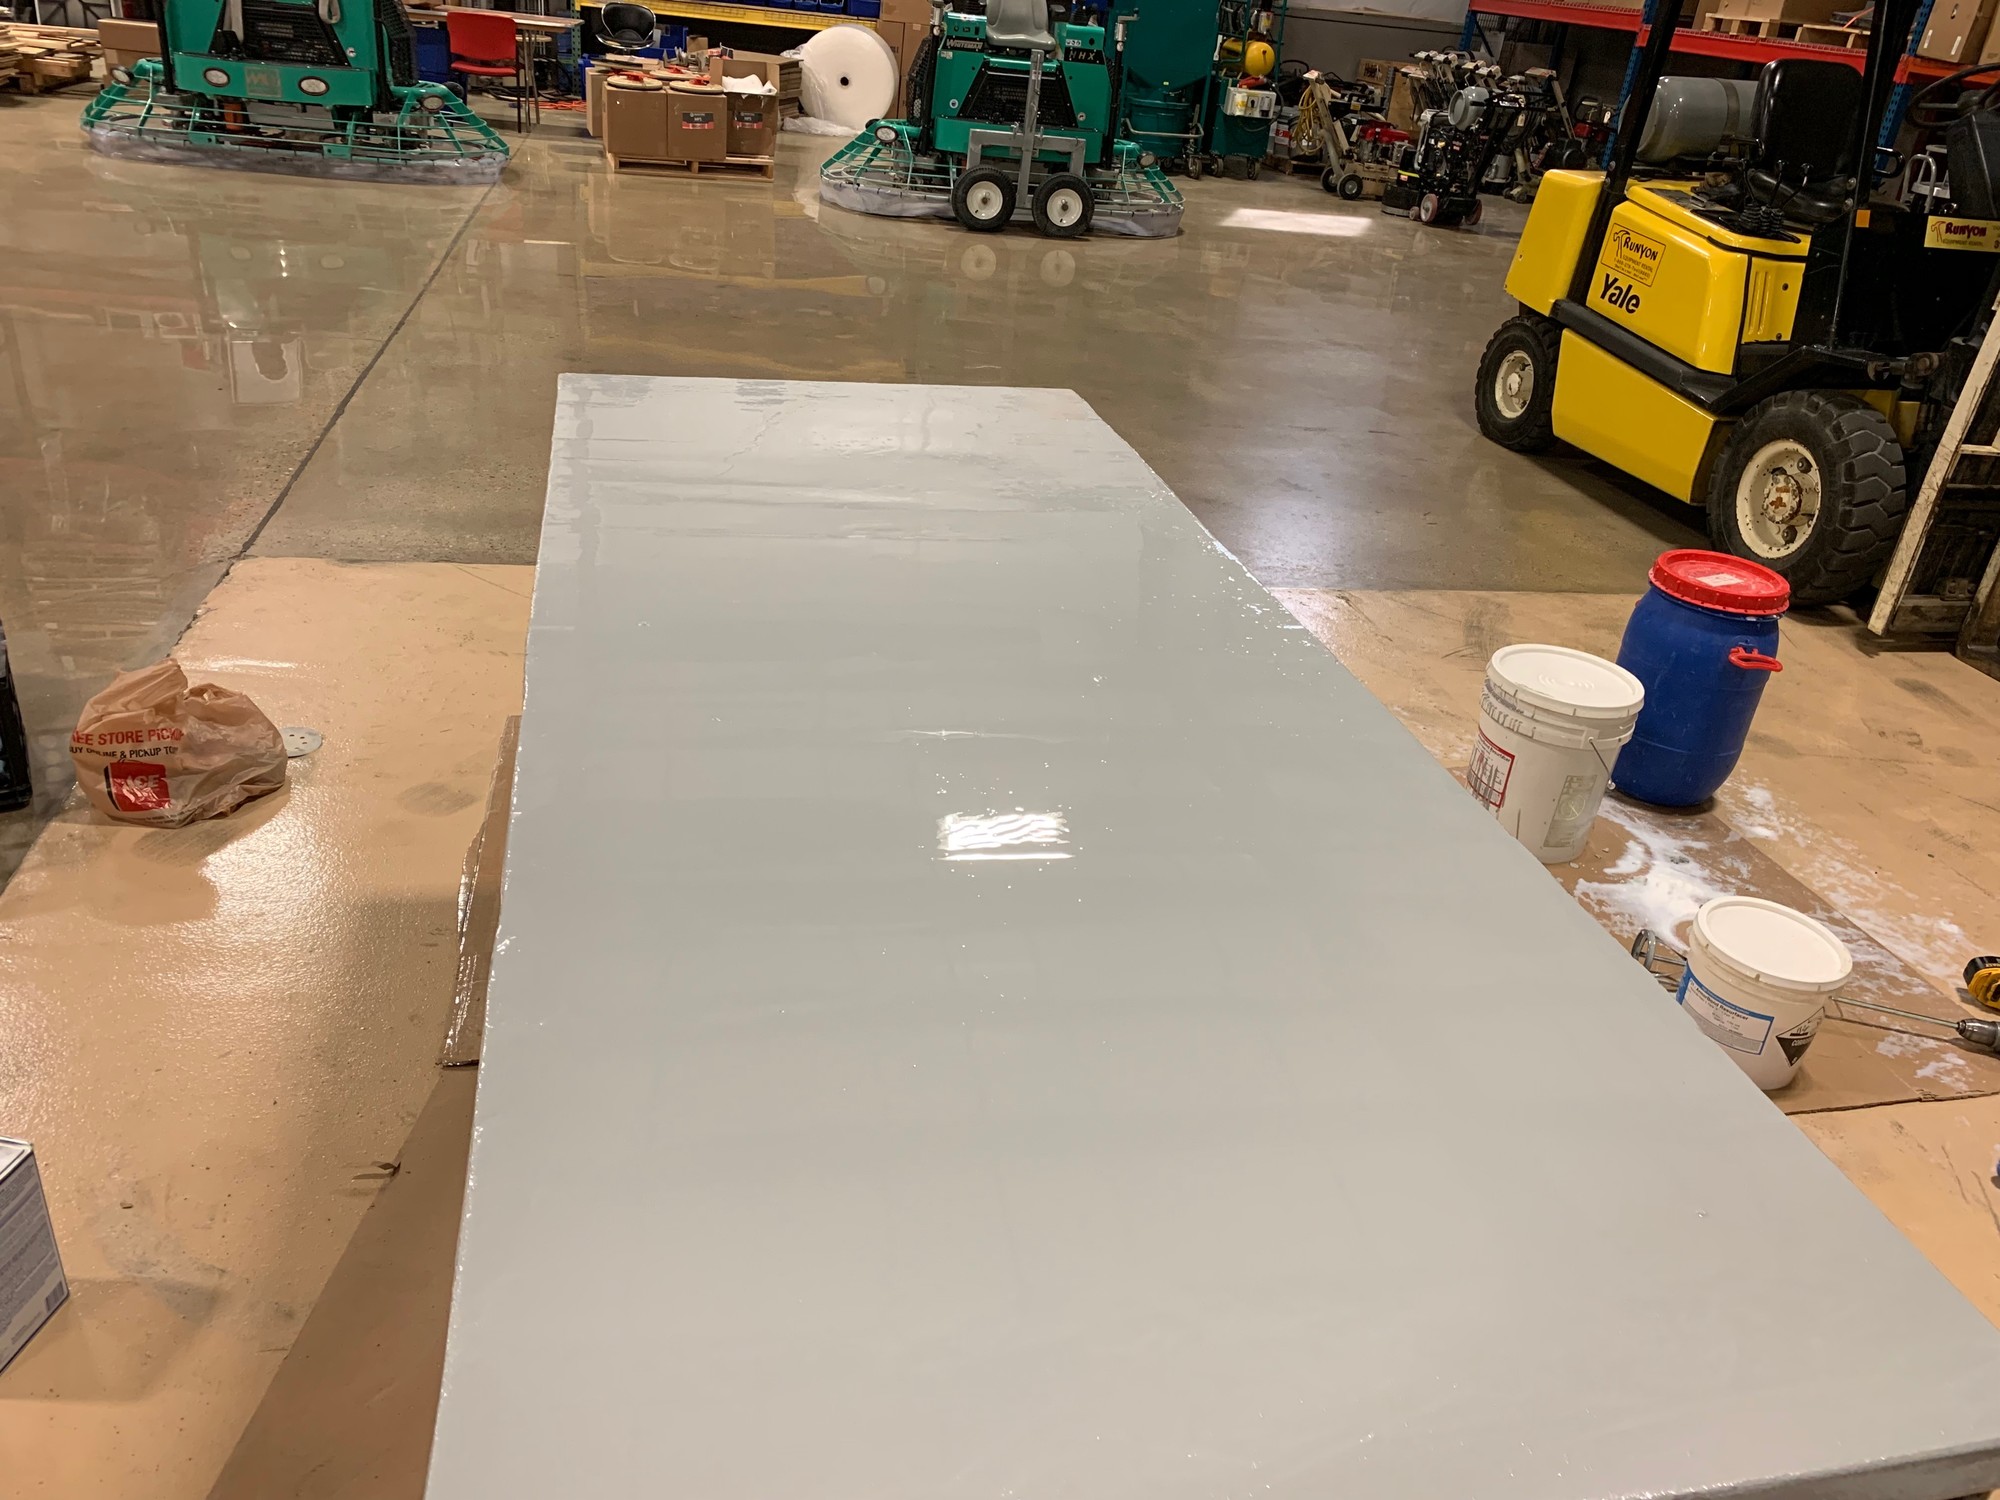 Step 2: First, be sure to wear a respirator when applying chemicals. Now, apply a coat of epoxy thickener followed by a coat of epoxy primer. This will prepare the tabletop for the epoxy coating. Don’t rush the primer dry time. A tacky surface will cause adhesion problems in the next coat.
Expert Tip: Wear nitrile gloves because epoxy can irritate your skin.
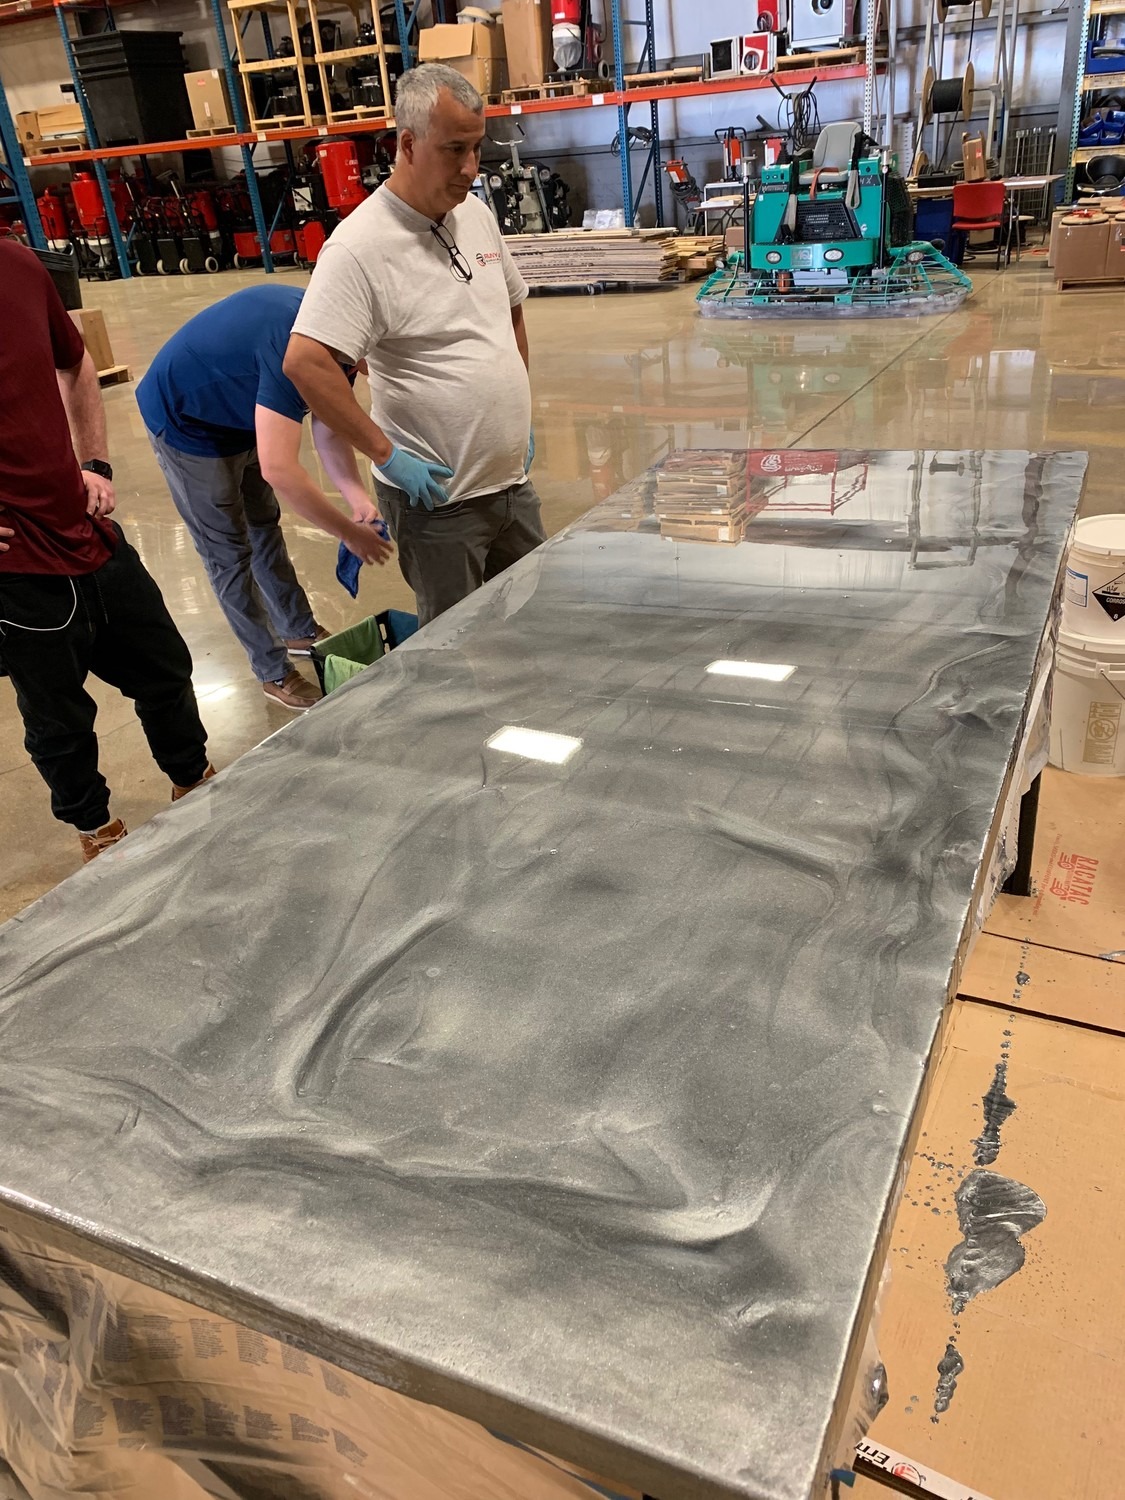
Step 3: Sand the primed surface again with 40-grit, and then apply your metallic epoxy coat using a magic trowel. The product self-levels as it cures. Work in a warm space if you can. Cold temps slow cure time and can affect how the metallic pigment moves.
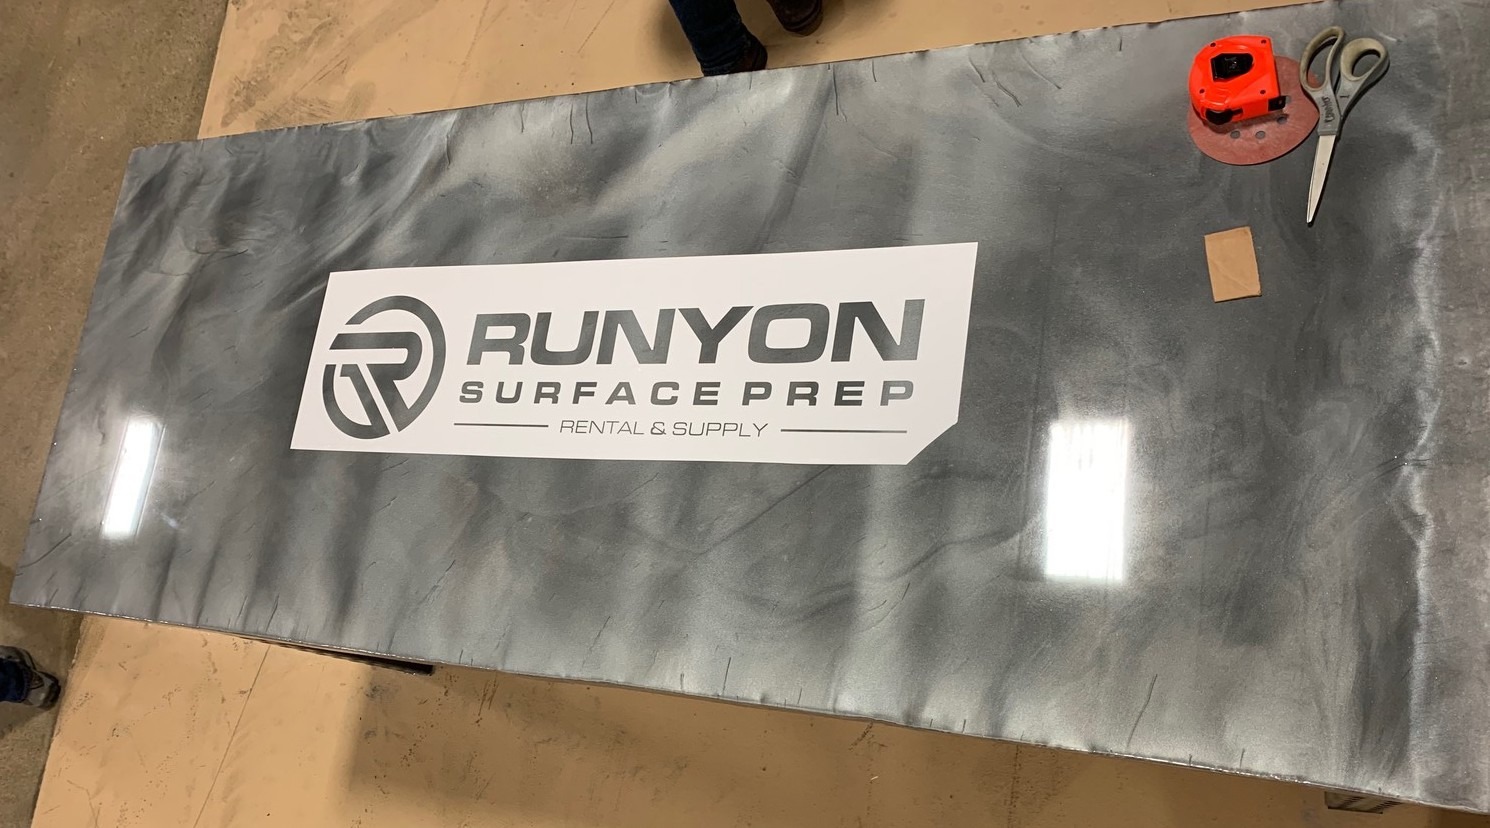
Step 4: After letting the material sit for 24 hours, lightly sand the surface with 220-grit sandpaper to smooth out any imperfections. After sanding, wipe the surface down with acetone and set your logo down in the middle of the table.

Step 5: Once your logo or other design is down on the surface, carefully coat inside the stencil with a 1-inch brush. After the image is fully coated, pull the stencil up to prevent bleed-through.
Expert Tip: Two thin coats beat one thick coat. A heavy application can trap bubbles or create drips at the edges.
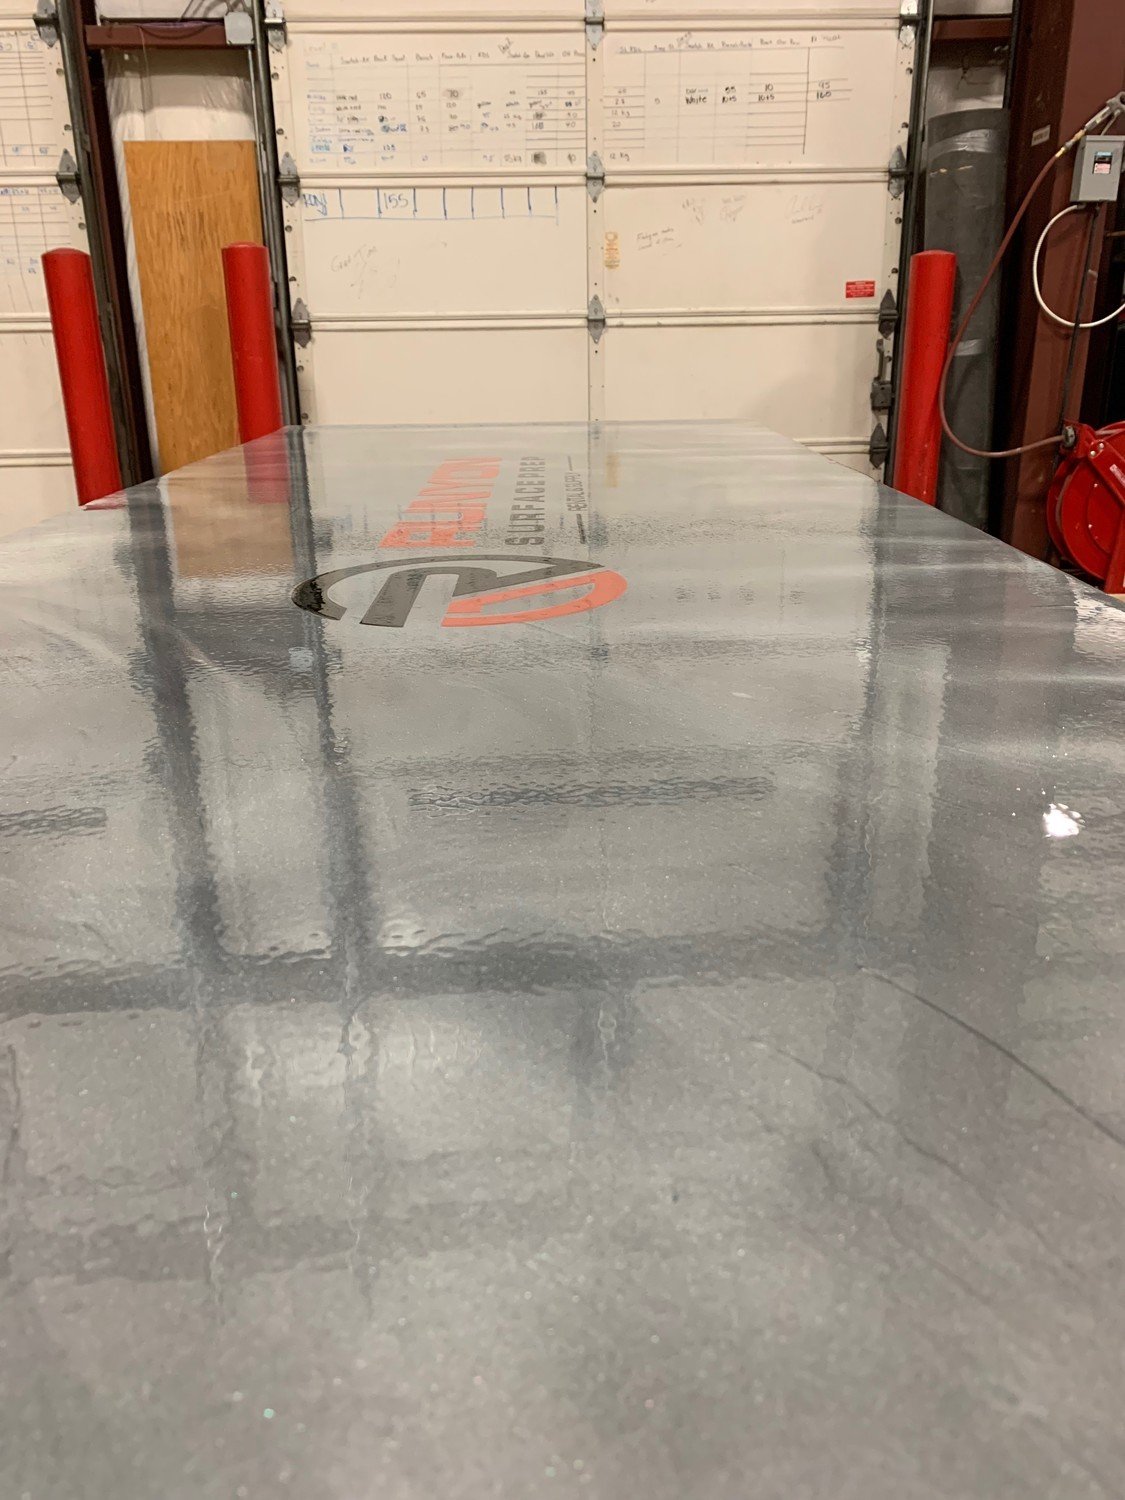
Step 6: After your logo is dry, you want to apply a urethane topcoat to protect the surface. This final process is applied with a 3/8 inch roller nap and directionally rolled to make sure the product is uniform.
Expert Tip: Don’t skip the urethane topcoat! It’s what protects the epoxy layer from scratches and UV yellowing over time.
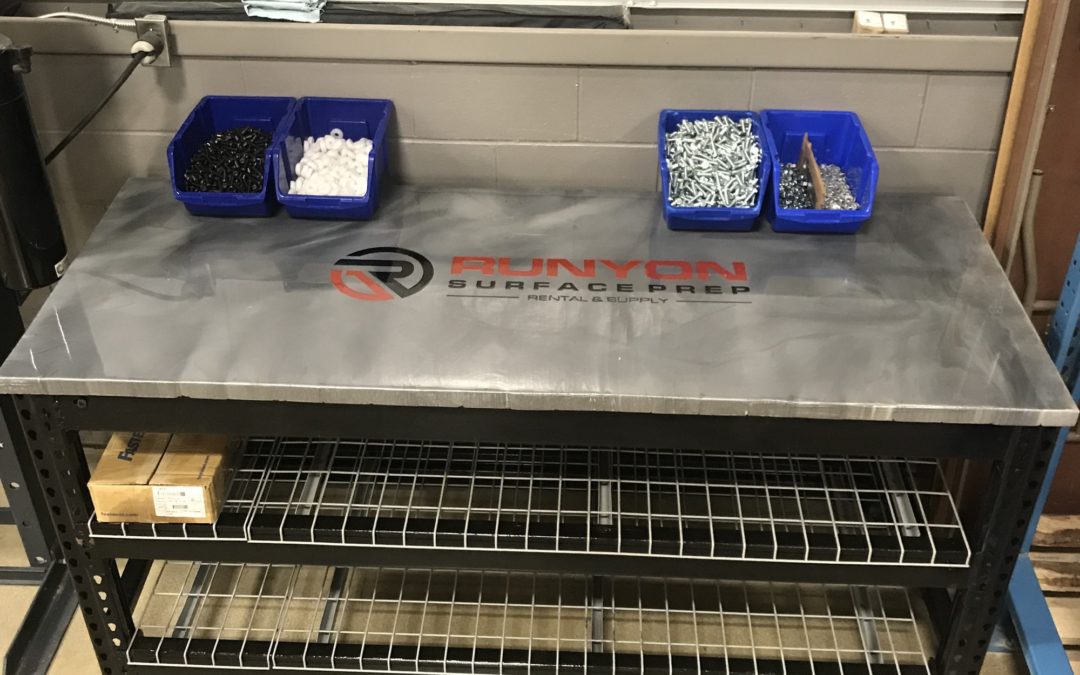
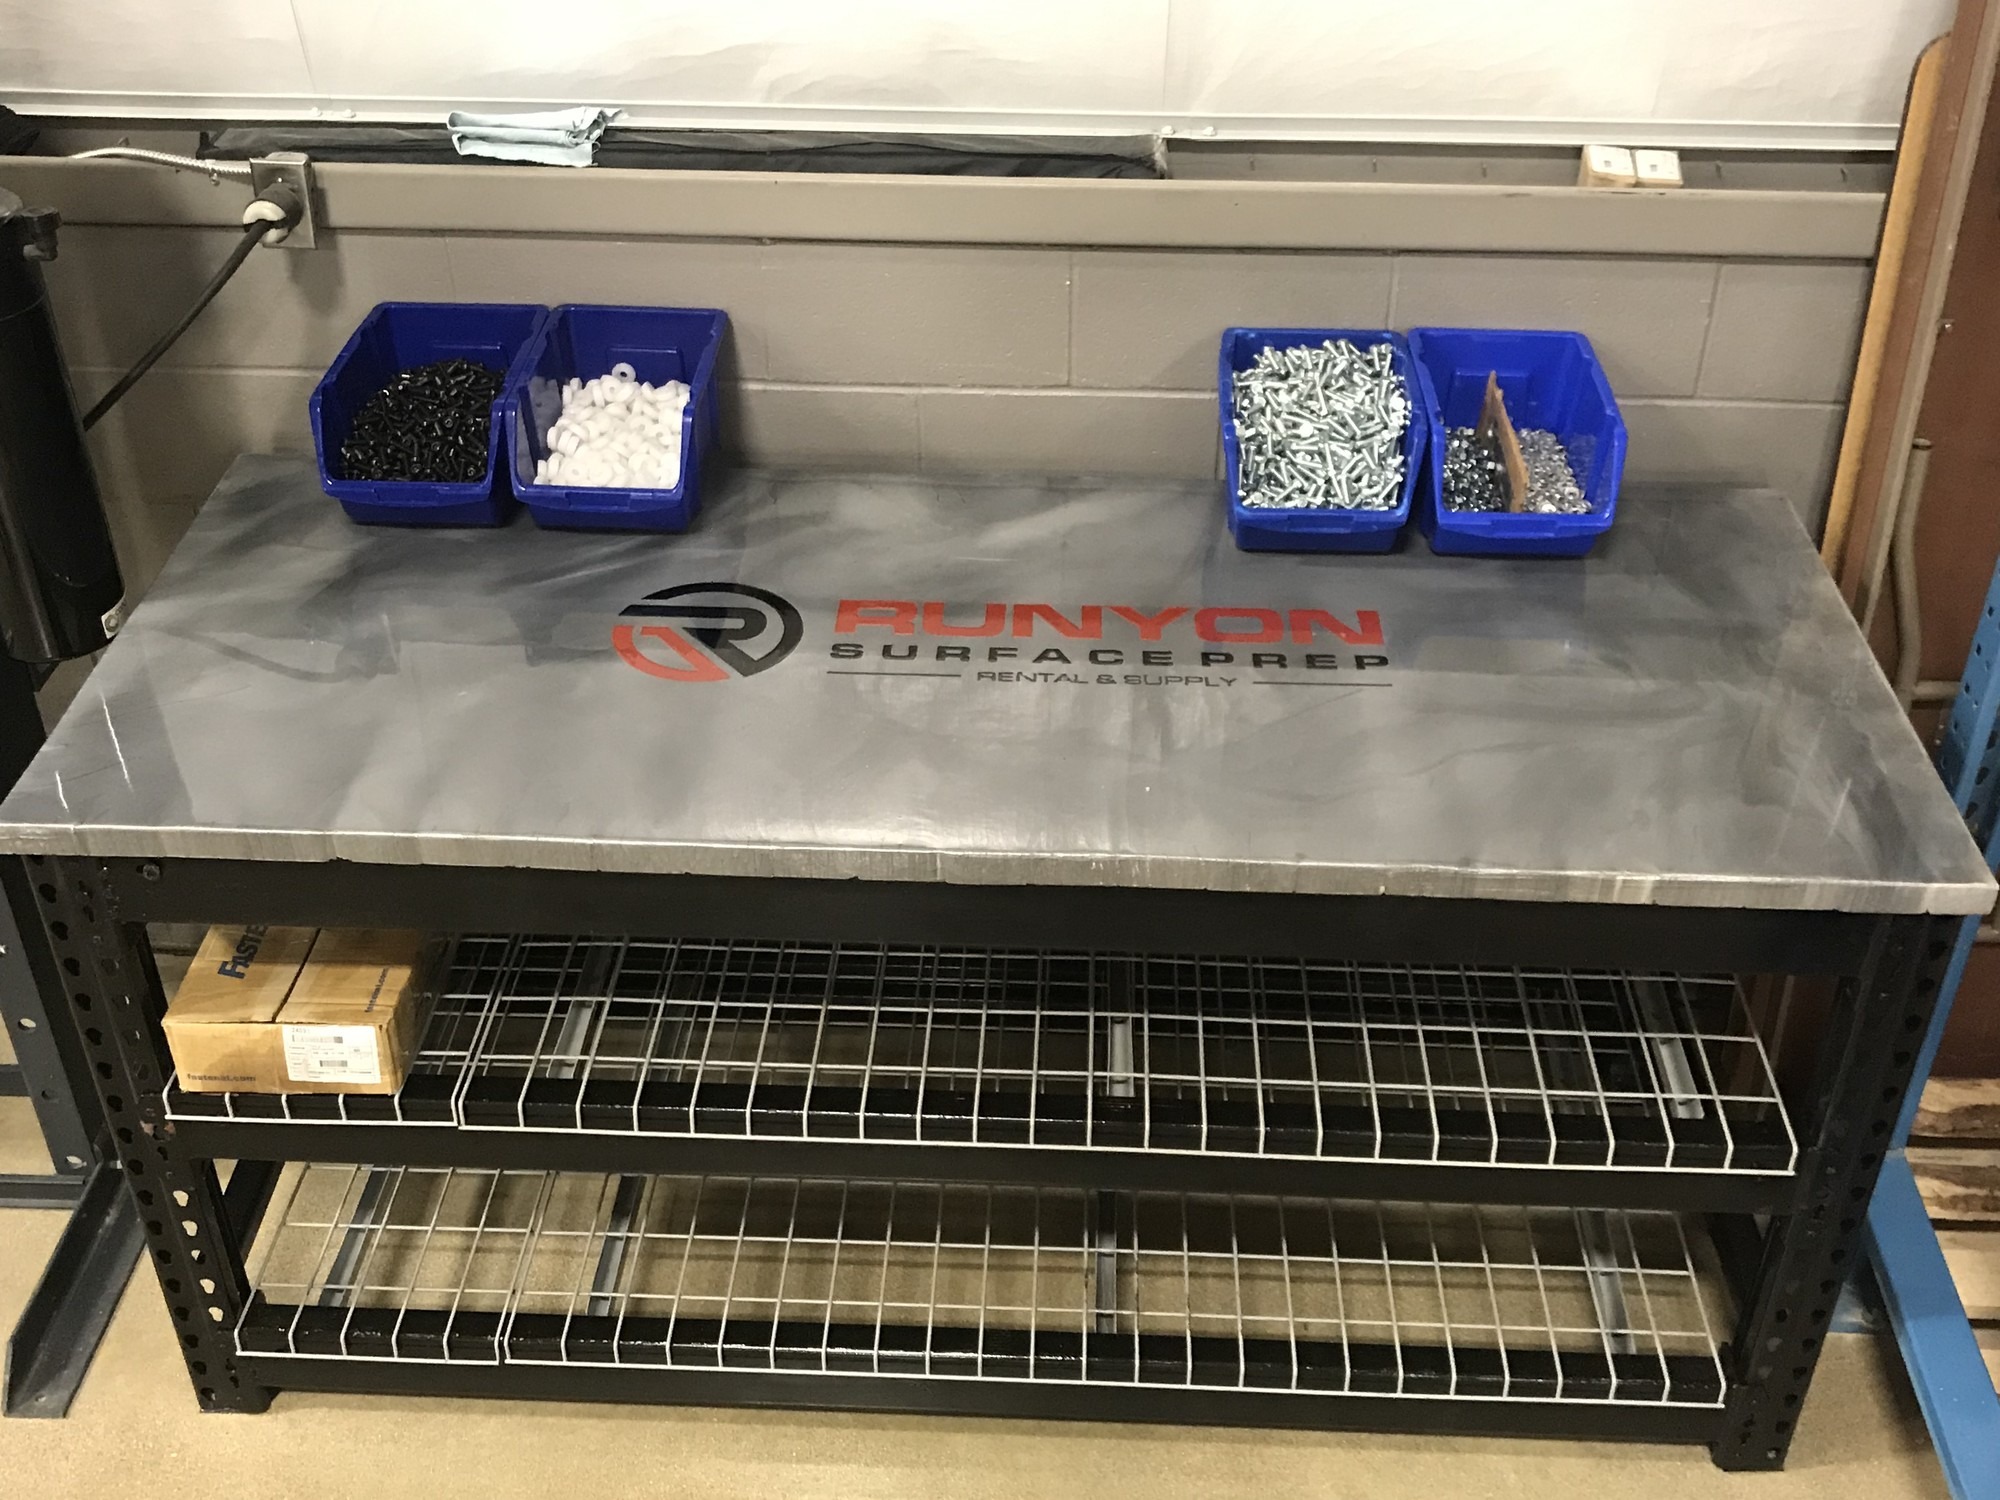
The Finished Product
How to Maintain Your Epoxy Workbench Top
Maintaining an epoxy tabletop is largely about keeping the surface clean and protecting it with an occasional fresh topcoat.
While your surface will be chemical-resistant, you should still wipe spills promptly as prolonged exposure may dull the finish. Generally speaking, clean regularly with mild soap and water and avoid abrasive scrubbers (like steel wool).
Speaking of abrasion, avoid dragging sharp metal objects directly across the surface if you can help it. Some scratches and dings are bound to happen over time; it’s a workbench after all. But a quick scuff-sand and fresh topcoat every few years can bring the surface back to life.
FAQs
Can I use epoxy floor coating on a workbench?
Yes. That’s exactly what this guide does. Just make sure the product is rated for wood substrates or use an appropriate primer first.
How long does an epoxy workbench top last?
With a urethane topcoat and reasonable care, you can expect 10+ years.
Do I need special tools?
A magic trowel, a roller, a brush, and basic sanding supplies are all you need.
Is epoxy safe to use indoors?
Ventilate the space well and wear a respirator during application.
Tabletop Coating Materials & Much More From Runyon
Runyon Surface Prep partners with small and big businesses, providing resources and equipment for a wide range of surface construction needs. Our clients look to our extensive catalog of surface prep products to help them get their jobs done and get them done well.
Questions about our products or workbench tabletop ideas? Connect with us online for more information.