

Glass in concrete floors not only offers an aesthetically pleasing finish but is also rooted in a rich history, practical applications, and sustainability.
Decorative concrete, especially infused with glass, has significantly progressed from the ancient art of terrazzo to the modern, customizable, and vibrant flooring options available today.
In this article, we delve deep into the methods of incorporating glass into concrete floors, answering critical questions and offering a step-by-step guide to achieving the bespoke look.
Benefits and Considerations
Glass in concrete floors transcends the ordinary, offering a visual masterpiece and embodying an ethos of environmental sustainability. These floors are a harmonious blend of cost-effectiveness, durability, and staining resistance.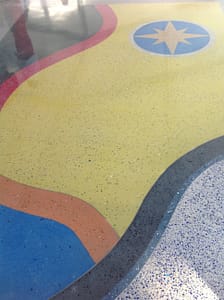
In this era of eco-conscious building and design, glass aggregates not only serve as a visual enhancement but can also effectively replace sand in concrete mixtures. This practice aligns with the rising tide of sustainable construction, introducing an element of eco-friendliness while maintaining, if not enhancing, the structural integrity of the concrete.
Each piece of embedded glass is a testament to a balanced fusion of artistry, endurance, and eco-consciousness.
Every surface becomes a unique narrative, an eco-friendly tapestry of color and texture, eloquently speaking to the seamless union of beauty and strength.
The Art of Terrazzo Glass in Concrete
Terrazzo’s journey, a craft born in 15th-century Italy, has transcended generations, from embedding marble chips in cement to integrating glass, creating stunning modern surfaces.
The contemporary use of recycled glass chips, vibrant and diverse in color, revives this ancient art, marrying sustainability with aesthetics.
As we explore the modern renaissance of terrazzo, mentioning the quality of materials used is paramount. American Specialty Glass products, available through Runyon Surface Prep, stand as a benchmark for those seeking to attain quality and aesthetics in glass-infused concrete.
ASG’s fine glass products are recommended for their chemical compatibility with cement, fostering a robust bond between the concrete mixture and the glass. The lighter hue of ASG’s fine glass enhances the subtle color effects in concrete, making every surface a canvas of artistic expression adorned with durability.
In this melding of art and technology, terrazzo emerges not just as a flooring option but as an artistic expression, each piece of embedded glass narrating a story of transformation and beauty.
Techniques for Incorporating Glass into Concrete Floors
In the infographic below, explore a visual summary of the integral and broadcasting methods.
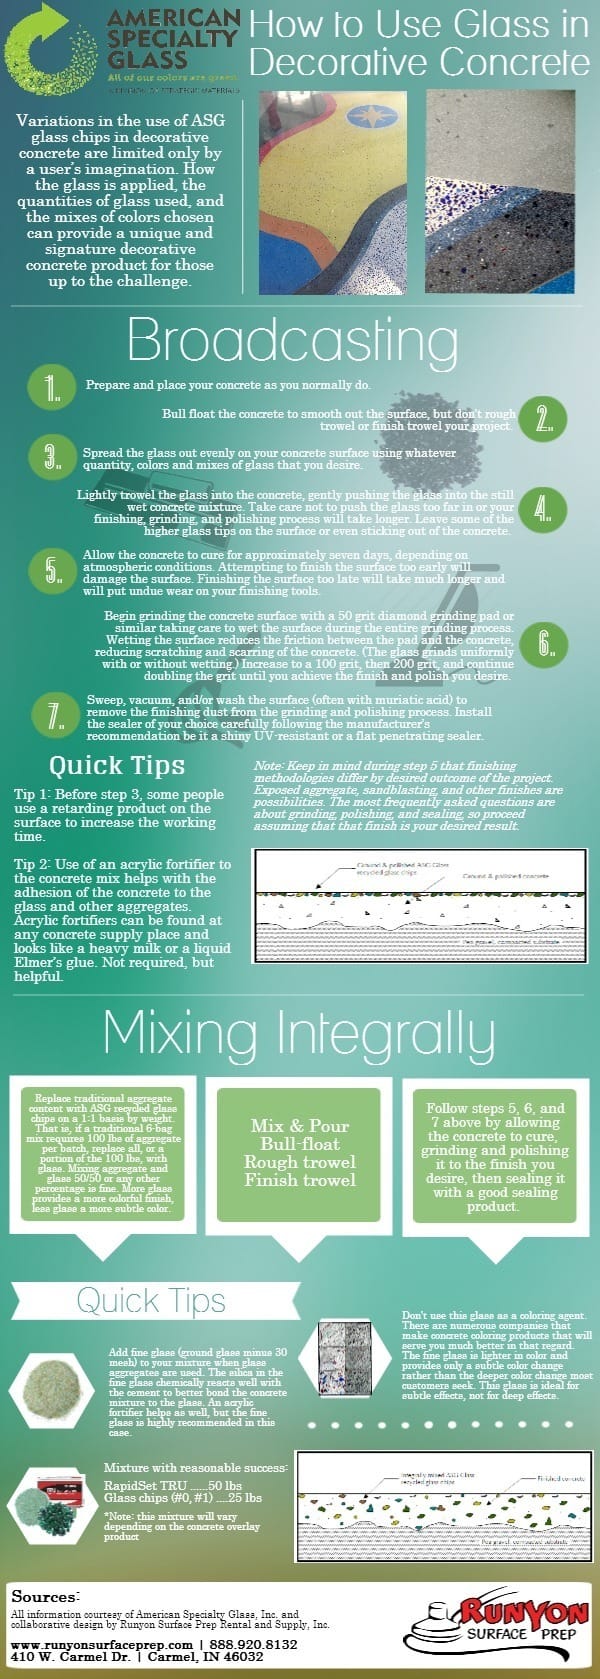
Mixing Integrally
The process involves integrating recycled glass chips into the concrete mix and replacing a part or all of the traditional aggregate. With this technique, glass and concrete amalgamate, presenting a uniformly radiant and colorful finish. The more glass is added, the more colorful and vibrant the finish becomes.
Enhanced Steps for Mixing Integrally
For optimal results, consider using CTS Rapid Set’s TRU Self-Leveling overlay, glass from American Specialty Glass, integral color from Ameripolish, and CS Unitec’s HIPPO Porta-Mix. These products have been proven to enhance the quality and finish of glass-infused concrete flooring.
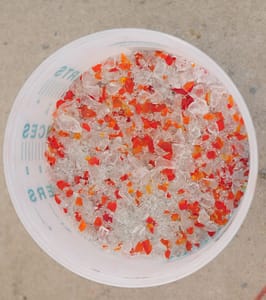
- Selection of Glass: Choose a clean, recycled glass of appropriate size and color.
- Mix Preparation: Combine water and dye (if using) before adding the overlay material.
- Screening: Use a 1/8″ classifier to screen the product, ensuring consistency.
- Combining: Mix the glass aggregate thoroughly with the overlay mixture.
- Application: Apply the mixed material, ensuring even distribution of glass and concrete.
- Finishing: Depending on the desired outcome, use tools like a smoothie for an even finish.
Professionals can achieve a surface characterized by aesthetic splendor and structural integrity by carefully selecting and preparing the glass and attentively mixing and applying the material.
Broadcasting Glass
A delicate yet highly customizable process, broadcasting involves sprinkling glass chips onto freshly poured concrete. The timing is crucial; too early, and the glass sinks; too late, and it fails to adhere. Mastering this technique unveils a surface where glass and concrete coexist in a captivating dance of texture and color.
Broadcasting Glass Finishing Process
- Place the product: Begin by placing the concrete overlay product evenly across the surface.
- Gauge rake to set depth: Use a gauge rake to set the depth, ensuring consistency and evenness across the entire surface.
- Purge any air pockets with a spike roller: Roll over the surface with a spike roller to eliminate air pockets. Enhance the final texture and integrity of the surface.
- Broadcast the glass: As the product begins to set, broadcast the glass evenly. The timing is pivotal to ensure the glass adheres properly and is visible on the finished surface.
These additional steps ensure the glass is not only effectively incorporated but that the concrete’s texture and integrity are optimized, yielding a final product that is as durable as it is aesthetically pleasing.
The Hybrid Approach
The hybrid approach allows artisans to meld the integral and broadcasting methods and explore the creative depths of their imagination. The resulting finishes are as robust as beautiful, with glass chips on the concrete surface.
Enhanced Hybrid Approach
- Initial Mixing: Start with integral mixing but with less glass aggregate.
- Application: Apply the initially mixed material on the surface.
- Broadcasting: As the material begins to set, broadcast an additional layer of glass onto the surface.
- Final Finish: Allow the material to cure properly, resulting in a surface that combines the evenness of integral mixing and richness of broadcasting.
The hybrid approach affords a versatile application. With the combined techniques, this approach offers a balanced yet customizable outcome, endowing the surface with a distinctive character.
Glass Aggregates and Their Applications
Sourced from post-consumer or post-industrial waste, glass aggregates undergo thorough cleaning to become the centerpiece of decorative concrete.
Glass can replace sand in various applications where glass not only replaces sand but elevates the aesthetic and functional attributes of concrete.
Step-by-Step Guide to Incorporating Glass in Concrete Floors
Preparation and Mixing
- Clean the selected glass aggregates.
- Choose a high-quality concrete mix and integrate the glass.
- Pour the combined mixture into the designated area, adhering to standard procedures.
Application Techniques
- For integral mixing, ensure uniformity and consider workability.
- In broadcasting, master the art of timing to achieve optimal adhesion and aesthetics.
- The hybrid approach demands precision, balancing the integral and broadcast methods for a unique finish.
Finishing Touches
- Polish to reveal the embedded glass’s radiant beauty.
- Maintain the surface to preserve its aesthetic and functional integrity.
Final Thoughts
As the world gravitates towards sustainable and aesthetic building solutions, the art and science of embedding glass in concrete floors stand out as a testament to innovation, history, and aesthetics coalescing.
Each piece of glass tells a story. Transform a disregarded bit of waste into the centerpiece of magnificent, durable, and eco-friendly concrete floors.
We hope we have inspired you to transform your space with these enchanting, sustainable floors.