
You may need to use shot blasting for several reasons. For one, you may have a small surface area that a large grinder cannot sufficiently prepare. Or you want to smooth out your concrete floor, or your surface only requires the removal of a thin layer of coating.
Whatever your reason, this shot blasting guide will review the process and the key steps. The following sections explain the basic principles of shot blasting and help users pick appropriate blast equipment for their work.
What Shot Blasting Is
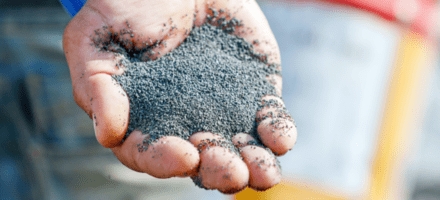
Shot blasting projects abrasive materials called “shot” or “media” onto surfaces. This process abrades and smooths surfaces, especially corroded ones. Materials range from mild grit for simple smoothing to steel shot for heavy-duty removal.
Intermediate blasting uses glass bead or plastic shot, while baking soda or dry ice handles very mild tasks. Different materials help users achieve specific surface textures. Users select the right roughness for coating applications and bonding operations.
Media blasting includes all methods that use abrasive materials to transform, clean, or enhance surface characteristics. The process has gained widespread acceptance because it works well for flooring, manufacturing, automotive work, and industrial maintenance.
How Shot Blasting Works
The process heavily hinges on using the right shot (or peen) velocity and quantity. Adjusting the amount of shot, the force applied, and the processing time is crucial to achieving uniform, clean blasts.
Professionals must know when and how shot blasting is used to select the appropriate industrial equipment and techniques.
The shot blasting system is a harmonious blend of advanced machinery, top-tier shot, and experienced technicians. The choice between a high-velocity shot and a specifically sized shot often rests on the urgency and precision of the task.
Modern techniques prevent too many shots from being used, thereby reducing the potential for damage, highlighting the adaptability of this process. All machines operate through a wheel or turbine system, which accelerates shot materials to high speeds.
The fast-moving shot impacts surfaces to remove existing coatings, rust, laitance, and surface impurities, preparing concrete and metal for upcoming treatment steps.
The blast pattern produces a consistent surface texture, which works well for epoxy coatings and industrial finishing applications.
Types of Shot Blasting
Different shot blasting methods help contractors select appropriate techniques for their specific requirements.
1. Wheel-Blast Systems
This system accelerates through centrifugal force to achieve high-speed projection. Wheel-blast machines operate in three main areas:
- Concrete surface preparation
- Automotive parts cleaning
- Large industrial cleaning operations
2. Air-Blast Systems
In contrast to wheel blasting, air systems project abrasives using compressed air.
The system operates best for:
- Precise metal cleaning tasks
- Maintenance blasting
- Confined space operations
3. Shot Peening
As noted earlier, shot peening uses controlled impact to strengthen metal components. This method is widely used in
- Aerospace
- Automotive
- Heavy manufacturing to increase fatigue resistance
4. Specialized Media Blasting
Grit blasting, bead blasting, soda blasting, and dry ice blasting fall under related technologies. Each is chosen based on how aggressive the process needs to be. While not all are considered “shot blasting,” they are frequently compared when deciding how to prepare a surface.
Shot Blasting vs. Sandblasting
While they share similar goals, the primary difference between shot blasting and sandblasting lies in the mechanism of the blasting process. Shot blasters operate on centrifugal force, driven by a high-speed rotating wheel.
In contrast, sandblasters project abrasive sand onto surfaces using compressed air.
Notably, before any coating or sealing, shot blasting can be used to remove contaminants from the workpiece’s surface, ensuring a pristine surface prior to coating. This is especially crucial for items like car parts, where the metal surface needs to be flawlessly prepped to bond well with subsequent layers.
Moreover, shot blasting can pre-prepare metals for subsequent manufacturing or treatment processes, providing an ideal starting point.
Environmental Impact
Another key distinction lies in environmental impact. Sandblasting often generates more airborne dust, while modern shot blasting systems collect and recycle media with far greater efficiency, improving containment and reducing cleanup time.
For more on how these processes compare to other prep methods, see our guide on what grinders, scarifiers, shot blasters, and scabblers can do for you.
Shot Blasting Benefits
Shot blasting is an indispensable step in many industrial and manufacturing processes with several advantages. It cleans and prepares surfaces for subsequent operations and brings about essential changes in the materials themselves.
For example, shot blasting can toughen and temper metals, making them more resilient to wear and tear. It is particularly beneficial for materials like steel and stainless steel, oftentimes subjected to heavy-duty applications and environments.
Adhesion
Another major advantage of a properly shot-blasted surface is its enhanced adhesion capabilities. After blasting, surfaces bond more effectively with coatings, sealants, or paints.
For instance, epoxy coatings can adhere more effectively to shot-blasted surfaces, resulting in a long-lasting, durable finish.
Eco-friendliness and safety
In addition to these benefits, shot blasting provides an eco-friendly process that eliminates the need for harsh chemicals. This process leads to longer lifespan and greater durability of protective coats, and it helps detect surface faults or defects that may require attention.
Furthermore, the absence of chemical use in shot blasting reduces potential hazards from dust content, further ensuring safety.
Versatility and ease-of-use
Another advantage is its ability to meticulously treat various types of surfaces, from rough concrete to delicate metal. When you need to attain a specific texture, precise blasting techniques can help achieve it.
In addition, shot blasting equipment is available in manual/push, self-propelled, and ride-on options, making this approach possible in various situations.
A self-propelled shot blaster allows you to be more productive in a shorter amount of time. However, manual shot blasters present a simpler makeup, which may save money in the long run if something goes wrong.
The combination of advantages makes shot blasting an excellent, dependable surface preparation technique. It delivers consistent results for applications that need precise surface profiles and extended coating lifespans.
Applications of Shot Blasting
Shot blasting serves multiple industries and various project types.
- Prepares concrete surfaces for epoxy, polyaspartic, and urethane system applications.
- Removes rust, scale, and corrosion from steel structures.
- Enhances automotive component cleaning and strengthening.
- Serves bridge construction, shipyard operations, and industrial manufacturing facilities.
- Creates textured concrete surfaces to improve slip resistance.
- Preps metal parts for powder coating and painting applications.
- Serves warehouse and commercial building floor restoration needs.
The flexibility and cleanliness make it the top choice for surface preparation when strong bonding and extended performance are required.
Shot Blasting Equipment
Runyon supplies surface-prep equipment and accessories to help you complete all aspects of your flooring endeavor. Looking for a shot blaster for just one or two jobs? Be sure to ask us about our rental options when you call!
We’re proud to offer high-quality shot blasters for an array of surface prep needs. Our catalog includes:
Vonarx Manual Shot Blaster: This compact, sturdy machine is ideal for small- to mid-size concrete and asphalt surfaces, especially in tight or hard-to-reach areas. Its inline separation system increases blasting capacity on 110V power, making it efficient for walkways, garages, basements, and similar spaces. Pairing it with a compatible dust collector improves performance and debris control.
Vonarx Self-Propelled Shot Blaster: This self-propelled unit is designed for medium and large horizontal surfaces and delivers strong, consistent blasting performance. Its optimized weight, improved wear-resistant lining, and integrated braking system support steady operation and longer service life. An adjustable handle and central controls make the machine easy to maneuver across wide areas.
Ultimately, Runyon is also your shot blasting guide, helping you work to the highest standards with the best equipment at your disposal.
If you’re deciding whether to buy or rent a shot blaster, we hope this overview helps you make a decision based on your project needs and budget.
You can find additional shot blasting equipment and accessories through our complete product selection.
How to Shot Blast
Once you’ve established the type of shot blaster and the type of shot you’ll need for the job, most machines will follow a process similar to the following list.
However, it’s important to note that you should always check the manufacturer’s instructions for machine operation and safety measures.
- First, ensure that you fill your shot blaster’s reservoir to the manufacturer-recommended level and that you’re careful not to overfill it.
- Tighten the lid over the reservoir.
- Attach vacuum hose (if applicable).
- Plug in your machine.
- Once you’ve started the blaster, move to avoid creating unwanted marks or cavities on your surface.
Depending on your surface and project goals, you should make several passes. If you want to remove layers, it may be easier to specify how many passes to take than to smooth the surface prior to coating.
Operate the machine at a constant speed while maintaining consistent overlap to achieve uniform blast cleaning results.
Use integrated dust collection whenever possible to improve visibility and reduce airborne debris.
FAQs
What is shot blasting used for?
The process of shot blasting serves three main purposes: surface cleaning and smoothing, and preparing a surface for coating. The process removes rust and contaminants to establish a controlled surface texture.
How much does shot blasting cost?
The cost of shot blasting services depends on surface dimensions, material strength, and the equipment requirements. The cost of industrial metal processing and precision work increases because of strict requirements for surface profiling and cleanliness standards.
Can I do shot blasting myself?
People with advanced DIY skills can perform shot blasting when they have suitable equipment and follow proper safety procedures. The operation of shot blasting machines requires special care because they generate high power, which can damage surfaces and invalidate coating warranties.
How long does shot blasting take?
Shot blasting can take anywhere from a few minutes for small areas to several hours for large commercial floors or industrial parts. The timeline depends on machine size, substrate hardness, and the required surface profile.
Is shot blasting environmentally friendly?
Yes, shot blasting is considered environmentally friendly because it uses recyclable media and avoids harsh chemical strippers. Many machines feature built-in dust-collection systems that help reduce airborne particles and reduce waste during cleanup operations.
What surfaces can be shot blasted?
Shot blasting works on concrete, steel, stainless steel, cast iron, and many types of metal components. The key is selecting media hardness and machine settings that suit the substrate without causing damage. In flooring applications, it’s especially popular for preparing concrete before epoxy or urethane coatings.
How do I choose the right shot blasting equipment?
Choosing equipment depends on your project size, desired surface profile, and whether you need manual or self-propelled mobility. Smaller areas usually benefit from compact manual units, while larger floors require wider blasting paths and stronger turbine systems. Consider your available power source and dust collection needs when selecting the machine.
What safety equipment is needed for shot blasting?
Operators should use eye protection, hearing protection, gloves, dust masks or respirators, and steel-toed boots. Shot blasting machines generate noise and fine debris, so PPE ensures safer operation and better visibility of the blast path. Enclosed areas may also require enhanced ventilation or vacuum attachments to reduce airborne particulates.